It’s the season for celebrations. Holiday parties mean one of two things. Either bring a token gift for the host or send guests home with a "thank you for coming over" present. Rather than troll the malls or surf the net, why not make something super simple instead? Both of these are kind of old-fashioned, but also charming and simple. Each took less than 30 minutes to make with supplies you probably already have at home.
Remember, Martha’s not coming over. This is not about impressing, but about something lovely from the heart and hands that brings joy.
ADVENT CALENDAR CANDLE
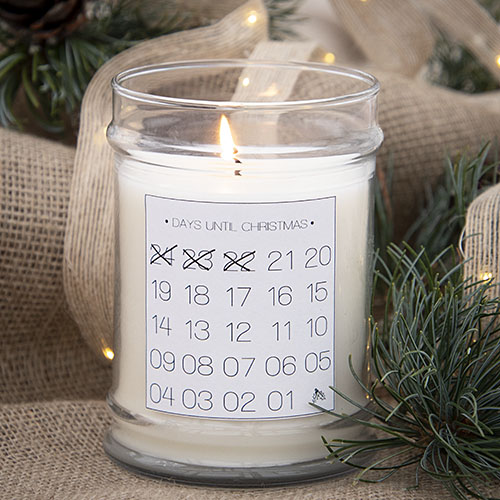
We saw a version of this at The Merry Thought. We knew it was a perfect (and perfectly easy) gift to make and share. We made our own candle using essential oils (this one's lavender and basil scented). Although, you could just buy a scented white candle in a glass holder that transports you back to your garden.
1. Wash the glass and let dry so label will stick.
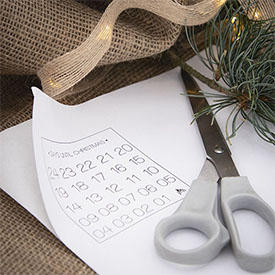
2. Use this link to download the calendar. Photocopy onto adhesive label paper (we used this) To fit our candle, we minimized the image to 45% and darkened it.
3. Cut to size and stick onto the clean glass surface. It’s nice to include a pen!
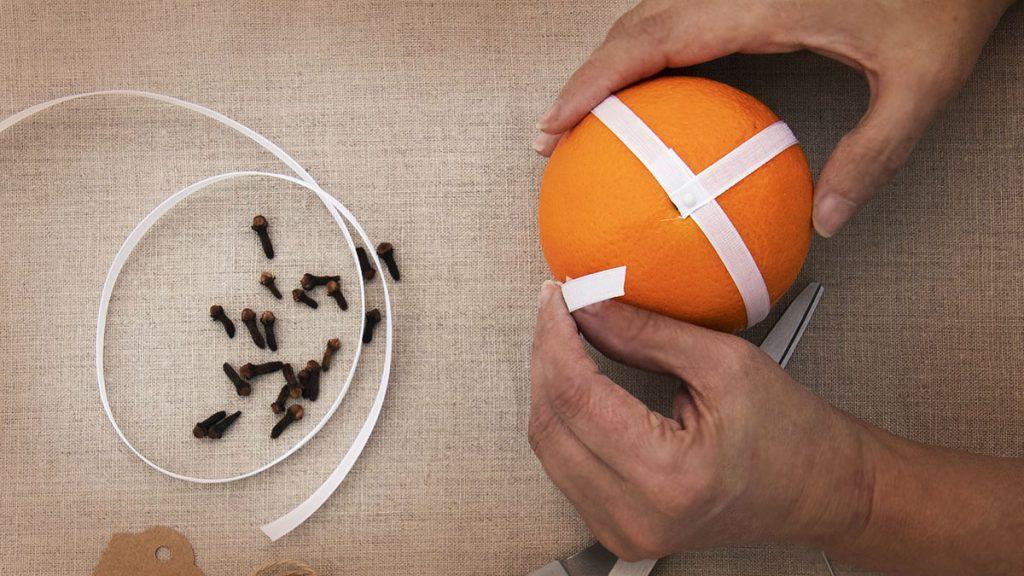
ORANGE AND CLOVE POMANDER
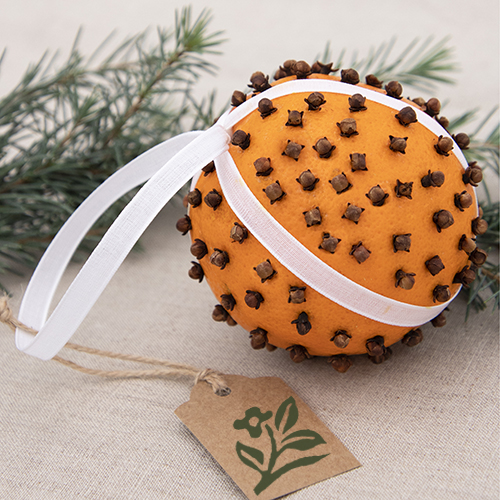
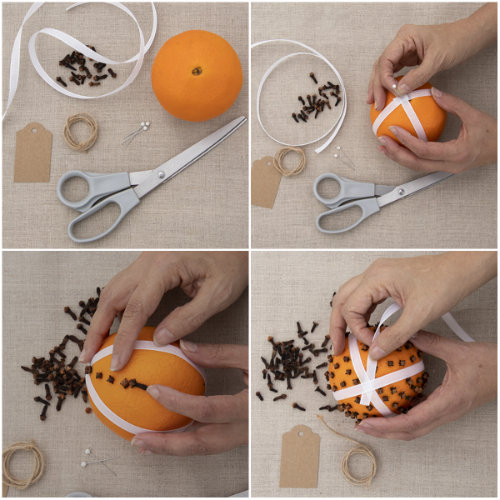
We know what you’re thinking–this is something for a six year old to make. But stay with us here! We were gifted one of these not long ago. We placed on the kitchen counter, perfumed the room with such a clean, fresh scent. It was so unexpected and clearly homemade. As they say, the classics are classic for reason! Place in a pretty gift bag set by the door so guests and scoop up as they depart.
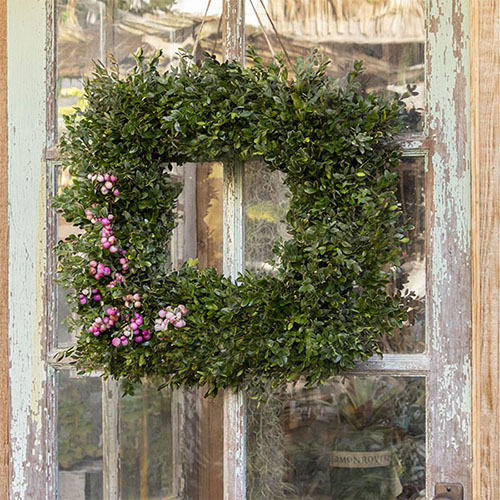
BOXWOOD WREATH
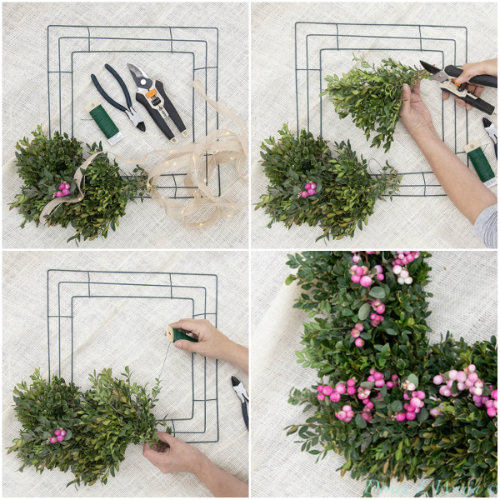
Step One: Gather supplies. Get a wire frame and paddle of green florist wire from craft store. Then get pruners, wire cutters, and plenty of boxwood branches–you’ll need about 20 dense branches for this project. Lighted ribbon is optional.
Step Two: Make small bundles of boxwood branches. Gather them in your hand and then clip ends so stems are about 6 – 8 inches long. You can make ahead and wrap the ends of the stems with wire, or make bundles as you go.
Step Three: Begin to wire bundles onto the frame. Place one bundle over the outside of the frame and the next bundle so over the inside of the frame. Continue to alternate outside and inside placement overlapping as you go. This will make your wreath very dense and lush. When you get to a corner, tuck the ends into the last bundle and continue to wire. Do not worry if the corners are not neat. You can fix this by adding more pieces at the end. Use a hot glue gun or just tuck them into the wreath.
Step Four: Finish by filling in as needed. Then either slip the stems of berries into the foliage or attach them with a hot glue gun. Hung in a sheltered location, this will stay fresh for about a week. Then it will dry to a lighter shade of green. If brought inside, keep away from direct sources of heat.
Image Credit: All images, Doreen Wynja